Archive
PHP – HTML5
PHP
Starting with PHP 5, the object model was rewritten to allow for better performance and more features. This was a major change from PHP 4. PHP 5 has a full object model.
features in PHP 5 are the inclusions of visibility, abstract and final classes and methods, additional magic methods, interfaces, cloning and typehinting.
PHP treats objects in the same way as references or handles, meaning that each variable contains an object reference rather than a copy of the entire object. See Objects and References
Features
Visibility : The visibility of a property or method can be defined by prefixing the declaration with the keywords public, protected or private.
HTML
How do you improve the performance of a website.
- code unification :Each CSS file must be loaded before the page can be displayed in an internet browser.
- compress css and javascript files:We can compress a CSS file by removing unnecessary spaces, comments,
- Using sprite images instead of multiple images
- Always put javascripts at the bottom of the page.
What is bootstrap ?
Bootstrap is CSS framework for developing responsive, mobile first projects on the web. Current version of bootstrap is v3.3.6. Bootstrap also comes with two preprocessors: less and saas.
Bootstrap uses 12 column grid system. Bootstrap’s grid system is responsive, and the columns will re-arrange depending on the screen size
What new features has been added in bootstrap 3?
- New Glyphicons icon font!
- Smallest file size.
- New grid system.
- its uses CSS compressors (Less/Saas)
Difference between container and container-fluid in bootstrap?
.container has a max width pixel value, whereas .container-fluid is max-width 100%.
.container-fluid continuously resizes as you change the width of your window/browser by any amount.
.container resizes in chunks at several certain widths, controlled by media queries (technically we can say it’s “fixed width”
because pixels values are specified, but if you stop there, people may get the
impression that it can’t change size – i.e. not responsive.)
Tell me latest jquery version ?
Latest version of jquery is V-3.1.0 (11-8-2016)
Difference between html5 tag and normal tag ?
HTML5 tag are called as semantic tags.
A semantic element clearly describes its meaning to both the browser and the developer.
<article>
<aside>
<details>
<figcaption>
<figure>
<footer>
<header>
<main>
<mark>
<nav>
<section>
<summary>
<time>
Difference between live and bind function in jquery.
The bind() method attaches one or more event handlers for selected elements, and specifies a function to run when the event occurs.
The live() method was deprecated in jQuery version 1.7, and removed in version 1.9. Use the on() method instead.
Some new fautures of css3?
- border-radius (border-radius: 25px;)
- box-shadow (box-shadow:3px 3px 3px 2px #797979;)
- Text Shadow ( text-shadow: #aaa 2px 2px 2px;)
- Multiple Backgrounds
.container {
/* fallback */
background: url(image/bg1.png) no-repeat;
/* modern browsers */
background: url(image/bg1.png) 0 0 no-repeat,
url(image/bg2.png) 100% 0 no-repeat;
}
- Transition
We can add animation to an element using transition. We need to specify these parameters.
- transition-property
- transition-duration
- transition-timing-function
- transition-delay
div {
width: 150px;
height: 150px;
background: red;
/* For Safari 3.1 to 6.0 */
-webkit-transition-property: height;
-webkit-transition-duration: 2s;
-webkit-transition-timing-function: ease-in-out;
-webkit-transition-delay: 1s;
/* Standard syntax */
transition-property: height;
transition-duration: 2s;
transition-timing-function: linear;
transition-delay: 1s;
}
what is closest in jquery ? What’s the difference between .closest() and .parents(‘selector’)?
.closest() method begins its search with the element itself before progressing up the DOM tree, and stops when current element matches the selector.
.parents() Begins with the parent element, get the parent of each element in the current set of matched elements
What is json?
JSON stands for JavaScript Object Notation. JSON is language independent, lightweight data interchange format. JSON data is written as key value pairs.
Eg :”name”:”Selva”
Explain position property in css?
The CSS positioning properties allow you to position an element. There are four different positioning methods: Static, Fixed, relative, absolute.
Difference between $(this) and this in jquery?
Keyword ‘this’ is a native DOM element. $(this) is a jQuery object that allows you to call functions such as .addClass() on it.
Will HTML5 canvas supported in IE ?
HTML5 canvas is not supported in IE version less than 9. ExplorerCanvas(excanvas) a JS library is the option to render HTML5 canvas for IE6, 7, and 8.
what is jsonp?
JSONP is nothing but JSON with padding. JSONP is mostly used in RESTFull APIs(Cross domain request). JSONP is a simple trick to overcome XMLHttpRequest same domain policy. (As you know one cannot send AJAX (XMLHttpRequest) request to a different domain.). JSONP request appends the callback function with URL. Eg: http://www.abcs.com/example.php?callback=simplecallback
Whenever the server receives the callback it will return the data. The data can be accessed using that call back function.
A simple implementation of JSONP request.
//
(function() {
var flickerAPI = “http://api.flickr.com/services/feeds/photos_public.gne?jsoncallback=?”;
$.getJSON( flickerAPI, {
tags: “mount rainier”,
tagmode: “any”,
format: “json”
})
.done(function( data ) {
$.each( data.items, function( i, item ) {
$( “” ).attr( “src“, item.media.m ).appendTo( “#images” );
if ( i === 3 ) {
return false;
}
});
});
})();
// ]]>
How do you create a simple plugin in jquery?
Sample plugin creation code is given below:
(function($){
$.fn.showLinkLocation = function() {
return this.filter(‘a’).each(function(){
$(this).append(
‘ (‘ + $(this).attr(‘href’) + ‘)’
);
});
};
}(jQuery));
// Usage example:
$(‘a’).showLinkLocation();
List out some CSS Frameworks for creating responsive templates?
Bootstrap
-> Bootstrap is mobile first framework. It includes predefined classes for easy layout options, as well as powerful mixins for generating more semantic layouts.
Foundation 3
-> Foundation 3 is built with Sass, a powerful CSS preprocessor. “Pricing Tables” is an interesting componenet in foundation 3. Pricing tables are suitable for marketing site for a subscription-based product. It also offers super cool features like Right-to-left text direction support.
Skeleton
Skeleton is a small collection of CSS files that can help to rapidly develop sites that look beautiful at any size, be it a 17″ laptop screen or an iPhone.
YAML 4
YAML 4 is built on SAAS. You can check the documentation in the above link.
ResponsiveAeon
Responsive Aeon is a simple, fast, Intuitive css framework. It contains almost 120 lines of code and only 1kb minified.
What is the difference between canvas and svg?
<canvas> is an HTML element which can be used to draw graphics using JavaScript. This can be used to draw graphs, create animations etc.
The <canvas> element is not supported in older browsers, but is supported in recent versions of all major browsers.
The default size of the canvas is 300 px × 150 px (width × height). But custom sizes can be defined using the HTML height and width property. The declaration is as follows.
<canvas id=”animate” width=”250″ height=”250″></canvas>
SVG stands for Scalable Vector Graphics (SVG) is based on XML markup language, for describing 2D vector graphics.
Can you explain the difference between cookies, sessionStorage and localStorage.?
LocalStorage stores data with no expiration date, and gets cleared only through JavaScript, or clearing the Browser Cache / Locally Stored Data – unlike cookie expiry.
Local storage and session storage are perfect for non sensitive data. The data stored in localStorage and sessionStorage can easily be read or changed from within the client/browser
so should not be relied upon for storage of sensitive or security related data within applications.
Data stored in the SessionStorage is only available for the duration of the browser session (and is deleted when the window is closed) – it does however survive page reloads.
In cookie, we can store 4096 bytes of data. Data stored in the cookie can be hacked by the user, unless the site uses SSL. We can also prevent injections like Cross-Site Scripting (XSS)/Script injection using httponly in the header.
Explain about quirks mode?
There are three modes used by the layout engines in web browsers: quirks mode, almost standards mode, and full standards mode.
Quirks mode is turned on when there is no correct DOCTYPE declaration, and turned off when there is a DOCTYPE definition.
However, invalid HTML – with respect to the chosen DOCTYPE – can also cause the browser to switch to quirks mode.
What is meant by hardware acceleration?
It means the graphical rendering is done on dedicated hardware (your GPU / graphics card) rather than your CPU. Hardware acceleration generally produces more fluid animation.In general you should always enable hardware acceleration as it will result in better performance of your application.
This will usually be a higher frame rate (the number of images displayed per second), and the higher the frame rate, the smoother the animation.
How can you load css resources conditionally?
Using CSS media querises we can load CSS contidionally. If you want to load the stylesheet for the device less than 600px, then you can declare as below.
<link rel=”stylesheet” media=”screen and (min-width: 600px)” href=”small.css”>
This style sheet will only load for screen size less than 600px.
Difference between article and section tag in HTML5. How can you nest them in your document?
The section element represents a generic section of a document or application. A section, in this context, is a thematic grouping of content, typically with a heading.
So basically the section element should contain related information bunched under a common heading.
The HTML5 <article> element represents a complete composition in a web page or web application that is independently distributable or reusable, e.g. in syndication.
This could be a forum post, a magazine or newspaper article, a blog entry, a user-submitted comment, an interactive widget or gadget, or any other independent item of content.
We can nest article inside a section tag and vice versa. This is completely legal interms of HTML5.
What happen when you dont use doctype?
When omitted, browsers tend to use a different rendering mode that is incompatible with some specifications.
Also HTML5 tags such as < article >,< footer >, < header >, < nav >, < section > may not be supported if the Doctype is not declared.
What are data- attributes good for?
The data-* attributes is used to store custom data related to the page or application.The custom data can be used in JavaScript to complete events or animations.
Which set of definitions, HTML attributes or CSS properties, take precedence?
CSS properties take precedence over HTML attributes. If both are specified, HTML attributes will be displayed in browsers without CSS support but won’t have any effect in browsers with CSS support.
How do I eliminate the blue border around linked images?
in your CSS, you can specify the border property for linked images:
a img { border: none ; }
However, note that removing the border that indicates an image is a link makes it harder for users to distinguish quickly and easily which images on a web page are clickable.
Explain about HTML5 local storage ?
There are two ways to store data in HTML as objects locally :
- localStorage – store data across session acess
- sessionStorage – storing data for current session only
Data will be stored in key/value pair format.
example:
localStorage.empid=”420″;
sessionStorage.companyname = “Thiruvarur info tech ”;
explain CSS media queries ?
CSS media queries are used to develop responsive templates for different layout of screen, print, mobile , tablet or any other resolutions
CSS media queries can be added in 3 ways as like CSS style sheet :
Internal stylesheet : <style type=”text/css”>
@media only screen and (max-width: 600px){
/* rules apply to the device resolution is 480px or less */
}
</style>
Imported stylesheet : @import “tablet.css” (min-width: 800px) and (max-width: 1200px);
External stylesheet: <link rel=”stylesheet” type=”text/css” href=”deskto.css” media=”screen and (min-width: 1200px), print and (min-resolution: 300dpi)” />
explain css inheritance ?
Inheritance propagates property values from parent elements to their children. The inherited value of a property on an element is the computed value of the property on the element’s parent element. For the root element, which has no parent element, the inherited value is the initial value of the property.
<div class=”firstClass secondClass thirdClass fourthClass ” > </div >
what is javascript inheritance ?
In simple terms, inheritance is the concept of one thing gaining the properties or behaviours of something else.
Inherited children inherit their parent’s behaviour To say A inherits from B, is saying that A is a type of B.
In JavaScript You must use a special object called prototype.
function Animal() {}; // This is the Animal *Type*
Animal.prototype.eat = function () {
alert(“All animals can eat!”);
};
function Bird() {}; // Declaring a Bird *Type*
Bird.prototype = new Animal(); // Birds inherit from Animal
Bird.prototype.fly = function() {
alert(“Birds are special, they can fly!”);
};
The effect of this is that any Birds you create (called an instance of Bird) all have the properties of Animals
var aBird = new Bird(); // Create an instance of the Bird Type
aBird.eat(); // It should alert, so the inheritance worked
aBird.fly(); // Important part of inheritance, Bird is also different to Animal
var anAnimal = new Animal(); // Let’s check an instance of Animal now
anAnimal.eat(); // Alerts, no problem here
anAnimal.fly(); // Error will occur, since only Birds have fly() in its prototype
explain javascript associative array ?
Associative arrays are where we can associate a key string with a value string
JavaScript objects are also associative arrays.
i.e the property emp.Name can also be read by calling emp[‘Name’]
We can access each property by entering the name of the property as a string into the array
it refers to accessing the DOM elements of HTML also [as object or associative array]
explain JS Namespace ?
Namespacing is a technique employed to avoid collisions with other objects or variables in the global namespace
and also helps to organize blocks of functionality into easily manageable groups that can be uniquely identified.
JavaScript doesn’t builtin support of namespacing but using objects and closures we can achieve a similar effect.
javascript Namespacing patterns :
1) Single global variables :
var myApplication = (function(){
function(){
/*…*/
},
return{
/*…*/
}
})();
2) Object literal notation :
var myApplication = {
getInfo:function(){ /**/ },
// we can also populate our object literal to support
// further object literal namespaces containing anything
// really:
models : {},
views : {
pages : {}
},
collections : {}
};
3) Nested namespacing :
var myApp = myApp || {};
// perform a similar existence check when defining nested
// children
myApp.routers = myApp.routers || {};
myApp.model = myApp.model || {};
myApp.model.special = myApp.model.special || {};
// nested namespaces can be as complex as required
4) Immediately-invoked Function Expressions :
// an (anonymous) immediately-invoked function expression
(function(){ /*…*/})();
// a named immediately-invoked function expression
(function foobar(){ /*..*/}());
// this is technically a self-executing function which is quite different
function foobar(){ foobar(); }
5) Namespace injection :
// define a namespace we can use later
var ns = ns || {}, ns2 = ns2 || {};
// the module/namespace creator
var creator = function(val){
var val = val || 0;
this.next = function(){
return val++
};
this.reset = function(){
val = 0;
}
}
creator.call(ns);
// ns.next, ns.reset now exist
creator.call(ns2, 5000);
// ns2 contains the same methods
// but has an overridden value for val
// of 5000
Type of webservice ?
there are two types of web service….1. SOAP [Simple Object Access Protocol] Webservice and 2. RESTful [REpresentational State Transfer] Webservice.
SOAP is a messaging protocol , REST is a design philosophy , not a protocol.
SOAP:
you define your interface in a .wsdl file, which describes exactly which input parameters are expected and how the return values will look like
there are tools to generate the .wsdl files out of java class hirarchies. JAXB for example
there are also tools to generate java objects/classes as part of eclipse for example (don’t know the name in the moment).
SOAP is very strict. Every request is validatet against the wsdl before processing.
A good but not so easy to start with framework for SOAP WS is Apache CXF
REST: (no hands on experience up to now, feel free to correct and improve 😉 ):
a way to access a webserver or web application to retrieve data from or send to it.
it’s only negotiated, how it is accessed.
common is something like this http://server.domain.com/app/type/id=123 to retrieve object of type type with id=123 very intuitive, but no automatic validation of requests.
The main advantages of REST web services are:
- Lightweight – not a lot of extra xml markup
- Human Readable Results
- Easy to build – no toolkits required
SOAP also has some advantages:
- Easy to consume – sometimes
- Rigid – type checking, adheres to a contract
- Development tools
What is namespacing?
In many programming languages, namespacing is a technique employed to avoid collisions with other objects or variables in the global namespace. They’re also extremely useful for helping organize blocks of functionality in your application into easily manageable groups that can be uniquely identified.Namespacing Fundamentals
- Single global variables
- Object literal notation
- Nested namespacing
- Immediately-invoked Function Expressions
- Namespace injection
Single global variables
One popular pattern for namespacing in JavaScript is opting for a single global variable as your primary object of reference. A skeleton implementation of this where we return an object with functions and properties can be found below:
var myApplication = (function(){
function(){
/*…*/
},
return{
/*…*/
}
})();
Object literal notation
Object literal notation can be thought of as an object containing a collection of key:value pairs with a colon separating each pair of keys and values. It’s syntax requires a comma to be used after each key:value pair with the exception of the last item in your object, similar to a normal array.
var myApplication = {
getInfo:function(){ /**/ },
// we can also populate our object literal to support
// further object literal namespaces containing anything
// really:
models : {},
views : {
pages : {}
},
collections : {}
};
One can also opt for adding properties directly to the namespace:
myApplication.foo = function(){
return “bar”;
}
myApplication.utils = {
toString:function(){
/*..*/
},
export: function(){
/*..*/
}
}
- Nested namespacing
- Immediately-invoked Function Expressions (IIFE)s
- Namespace injection
- Explain about css specificity
- what is the use of box shadow and tell me the syntax.
- how to acheive rounded corners in css3.
- How will you improve the performance of a website.
- What is the use of sprite images.
- What are the different font formats and how will you include in your css stylesheet.
- What is responsive web page layout.
- What is fluid layout and advantages of it ?
- What do you know about css animations. Will you do css3 animation if we give google access?
- what are the css frameworks you know. have you ever used any css frameworks like LESS SAAS?
- Difference between HTML4 and HTML5?
- What is the use of canvas ? have you ever used it.
- What is the main difference between canvas and svg?
- What are semantic tags in html5. What is the main advantage of it.
- How will you add a jquery to your page.
- What is the diiference between javascript and jquery?
- Tell me the difference between document.ready and onload function in jquery?
- how can u apply css in jquery?
- Can you dynamicaaly add a div using jquery ?
- What are filters in jquery?
- What is an anonymous function in jquery and how will you define it?
- Have you ever heared about MVC in javascript?
- Javascript or Jquery which is faster ?
- How can you animate using Jquery?
- Tell me the use of is() , eq() methods in jquery?
- Why we use index() method in jquery.
- Tell me jquery.noConflict() method.
- Have you ever contributed any plugin?
- Tell me what are the Jquery UI you know. And how can you customize them.?
7 common mistakes in Magento SEO
1. Homepage title “home”
If I had a dollar for every Magento store out there I’ve seen with a homepage title “home” I’d be a rich man. The homepage is usually a CMS page. Go in there and change the title of the page into something more suitable such as “Blue Widgets Online Store – Example.com”.
2. Using “default description” field
System > Configuration > General > Design > HTML Head > Default description – Leave this blank or you’ll have such a mess of duplicate descriptions on your store that don’t really describe the given URL that it will be unbelievable. Also, please make sure your meta keywords are not “magento, magento commerce” etc.
3. Not turning on rel=canonical
Save yourself from lots of duplicate content issues. Turn canonicals on for both products and categories.
4. Logo title and/or alt “Magento Commerce”
Logo, usually in the top left of your website. Don’t have it say “Magento Commerce”. I’ve seen that a lot of times.
5. Forgetting to turn meta robots to “index, follow” and remove robots.txt disallow after a move from staging/dev site to the live site
System > Configuration > General > Design > HTML Head > Default robots “INDEX, FOLLOW”.
Sometimes people leave this as noindex, nofollow on dev server and forget to change it when they migrate to the live server.
6. Having a default layered navigation
Layered navigation is a hell for the SEO.
7. Building a sitemap with sample products and sample categories
I’ve seen this one as well. Check what’s in your sitemap.xml before you submit it to Google. No sample products please! ![]()
A Beautiful CSS3 Animation

<!–DOCTYPE html PUBLIC “-//W3C//DTD XHTML 1.0 Transitional//EN” “http://www.w3.org/TR/xhtml1/DTD/xhtml1-transitional.dtd”>
xmlns=”http://www.w3.org/1999/xhtml”>
<head>
<meta http-equiv=”Content-Type” content=”text/html; charset=iso-8859-1″ />
<title>Untitled Document</title>
<style>
#sweet {
position: fixed;
margin: 0 45%;
top: 10em;
}.intro {
background-color: #fff;
border: 2px dotted #f46;
box-shadow: 0 0 18px hsla(0,0%,0%,.5);
width: auto;
height: auto;
-webkit-animation: round 3s linear infinite;
transition: border-radius 0.3s linear;
}.outro {
background-color: #1f1f24;
margin: 0px;
border: 5px solid #c16;
border-radius: 0px;
width: auto;
height: auto;
box-shadow: 0 0 18px hsla(0,0%,0%,.5);
-webkit-animation: rounddd 9s linear infinite;
transition: border-radius 0.3s linear;
}.intro:hover {
border-radius: 35%;}
.outro:hover {
border-radius: 50%;
}
@-webkit-keyframes round {
0% {-webkit-transform: rotate(720deg);
-moz-transform: rotate(720deg);
-ms-transform: rotate(720deg);
-o-transform: rotate(720deg);
transform: rotate(720deg);
}100% {-webkit-transform: rotate(360deg);
-moz-transform: rotate(360deg);
-ms-transform: rotate(360deg);
-o-transform: rotate(360deg);
transform: rotate(360deg);
}
}@-webkit-keyframes rounddd {
0% {-webkit-transform: rotate(0deg);
-moz-transform: rotate(0deg);
-ms-transform: rotate(0deg);
-o-transform: rotate(0deg);
transform: rotate(0deg);
}100% {-webkit-transform: rotate(720deg);
-moz-transform: rotate(720deg);
-ms-transform: rotate(720deg);
-o-transform: rotate(720deg);
transform: rotate(720deg);
}
}
</style>
</head><body>
<div id=”sweet” align=”center”>
<div class=”outro”>
<div class=”intro”>
<div class=”outro”>
<div class=”intro”>
<div class=”outro”>
<div class=”intro”>
<div class=”outro”>
<div class=”intro”>
<div class=”outro”>
<div class=”intro”>
<div class=”outro”>
<div class=”intro”>
<div class=”outro”>
<div class=”intro”>
<div class=”outro”>
<div class=”intro”> <div class=”outro”><div class=”intro”>
<div class=”outro”>
<div class=”intro”>
<div class=”outro”>
<div class=”intro”></div>
</div>
</div>
</div>
</div>
</div>
</div>
</div>
</div></body>
</html>
Related articles
- LESS – The CSS Preprocessor, Tools, Mixins And Libraries (designresourcebox.com)
- What is your plan B when selling your Los Gatos house!? (davidmortaz.com)
- CSS3 Animation Demystified (teamtreehouse.com)
- Simple Internet Marketing Guidelines You Can Feel Good About (extra-cash-online.com)
Jquery Timeago Implementation with PHP.
Nowadays timeago is the most important functionality in social networking sites, it helps to updating timestamps automatically. Recent days I received few requests from 9lessons readers that asked me how to implement timeago plugin with dynamic loading live data using PHP. In this post I am just presenting a simple tip to implement timeago in a better way.
Why Live Query
LiveQuery utilizes the power of jQuery selectors by binding events or firing callbacks for matched elements auto-magically, even after the page has been loaded and the DOM updated.
Code
Contains javascipt code. $(this).timeago()- here this element is refers to timeagoclass selector of the anchor tag.
// <![CDATA[
javascript” src=”js/jquery.min.js”>
// ]]>
// <![CDATA[
javascript” src=”js/jquery.livequery.js”>
// ]]>
// <![CDATA[
javascript” src=”js/jquery.timeago.js”>
// ]]>
<script type=”text/javascript”>
$(document).ready(function(){
$(“.timeago”).livequery(function() // LiveQuery
{
$(this).timeago(); // Calling Timeago Funtion
});
});
</script>//HTML & PHP Code
<!–?php
$time=time(); // Current timestamp eg: 1371612613
$mtime=date(“c”, $time); // Converts to date formate 2013-06-19T03:30:13+00:00
?>You opened this page <a href=’#’ class=’timeago’ title=”<!–?php echo$mtime; ?>“></a>
Is SEO Dead After Google Penguin Update?

Image via CrunchBase
Google makes an effort to keep its search engine free from the deliberate tampering of it in order to favor large businesses every now and then. The Google Penguin 2.0 update is a step in the right direction for this search giant to make Google Search more foolproof and at the same time dependable to businesses with a clean reputation.
Google Penguin 2.0 algorithm favors white hat SEO techniques and is bent upon discouraging black hat SEO techniques that are rampant in the business world. These black hat techniques take unwarranted advantage of Google Search by promoting a lot of spammy and malicious links to gain high placing in SERPs. Thus the search engine users are deprived of the privileges of an enhanced experience and a score of benefits that entail the use of every Google product.
What to expect from Google Penguin 2.0?
This update to the Google Penguin algorithm has made many changes to its earlier versions. Here are a few of those changes that can affect the websites and how business would react to them:
1. Devaluation of Websites
Sites accustomed to direct many of their outbound links to a single website are akin to be tagged with a hefty penalty as a caution to desist from this practice. Google has no qualms about directing your outbound links to a wide variety of other websites that are deemed to be authoritative. This is very much encouraged.
Websites that are found to be faltering in creating pages having substantial content or for that sake, content that is non-relevant are also penalized. If not penalized, they are more likely to lose authority over their links that are embedded within their content.
Bloggers too are at the risk of being penalized by having their blogs devalued if they make it a habit of regularly publishing non-relevant links and content.
How can bloggers be safe from these penalties?
People who maintain blogs have to be very careful in coming up with suitable candidates for their guest blogging endeavor that do not link their blogs to low quality websites. They should also be people who are expected to post content that is relevant to the site that the former intend to link within the post.
It should be safer to link the content within the guest blog post to other sites which have no vested interest in but that are capable of offering value to the reader or contribute significantly to the content of their post.
2. Devaluation of Back Links
Guest blog posts carrying a keyword-rich text link in their very first paragraph are likely to carry less weight. Rehashing previously published content and then republishing it with embedded links should be avoided as they too are likely to meet the same fate. This has been the norm since the last versions of Google Penguin and the trend will continue with this version too.
Links embedded within the author bio section of the guest blog posts do not carry the same weight as they used to before. Going by the trend that Google is picking on, these links are expected to lose their value even more in the upcoming versions of Google Penguin. Google can be extremely selective in the later versions to come.
What can businesses do to adapt?
Businesses cannot waste a lot of time and effort on techniques that facilitate the easy and quick acquiring of links in bunches. More emphasis has to be laid on delivering quality content that can entice visitors to their net. This way is more natural than other spammy ones.
3. Emphasis on Co-occurrence
Until recently, emphasis was laid on the traditional signals that were thought of as influential in deciding rankings on the SERPs such as keyword placement, anchor text, links and authority. Now with the introduction of Google Penguin 2.0 importance is given to co-occurrence of words, phrases and links within the search queries as the major deciding factor in garnering the topmost ranks on the SERPs.
Evidence backing co-occurrence
This connection between co-occurrence of words, phrases and links within the search queries and textual content with top rankings on SERPs has well been established through an in-depth research on this topic from people with expertise in umpteen citations. Nonetheless, anchor text will surely decide rankings on SERPs by providing signals, but Google will deal with it in an entirely different way.
The very glimpse of a Google SERP when people use it for a query can point to the fact that co-occurrence does play a major role in rankings. While searching for a query, one can find many sites that rank high without the presence of authoritative links, relevant text back links, the search query in the HTML title and a non-availability of query occurrences in the document body. This is reason enough for all the attention lavished on the co-occurrence of words, phrases, links and other content by Google Penguin 2.0.
What exactly can be termed as co-occurrence?
To be concise as to exactly what can be termed as co-occurrence, it is best described as the presence and frequency of terms that tend to occur at the same time on the same pages without being hyperlinked. Quite obviously, Google deals more sophisticatedly with this term and its extensive usage is well witnessed with the introduction of Google Penguin 2.0.
How can businesses adapt to this?
Businesses should bear in mind that there isn’t a necessity to link back to their website from inside of the blog post. Focus should be put on creating useful and engaging content that educates readers. They can make a mention of their company without hyperlinking to it, if the situation demands.
For a guest blog post, it should be noted that it’s inappropriate to mention their company outside of the author bio section. It should only be done in the wake of dire need as in the case where the linking of their content adds substantial knowledge and support to their guest post.
4. Emergence of Author Rank
Author Rank lets Google know the whereabouts of people’s content on the web the moment they publish it. This means that one can send a message to Google by periodic publishing of high quality content on the web about their commitment to quality and in all likelihood, it will surely reciprocate by placing more authority and weight on their content.
What are its adverse effects on businesses?
This can also mean that if businesses continuously publish low quality stuff and filler content, Google will be keeping track of it and many of these links in such type of content will be devalued in time. This is applicable to even the content published on a high authority domain. To be short, Google will not only be devaluing websites and links, but also erring authors too.
How can they adapt?
Businesses should be very choosy with the content that they end up publishing. The content published should be well edited beforehand and prove engaging to the readers. Utmost care should be taken to ensure that the content sticks to the overall idea from the start to the finish lest it leaves the reader confused and compel him to search quality content elsewhere.
5. Use of Social Media Signals
As social media accounts for a number of profiles and can give a search engine a clear idea of the inclinations of people and other statistics, Google has relied heavily on Google+ to better its search results. At the same time, the Google Penguin 2.0 update makes an attempt to curb malpractice among organizations that aim to deliberately tamper the search results like paying people and other entities to create social shares, votes and likes in mass quantities to promote their content.
How can businesses adapt?
Writing content that they wouldn’t mind their name getting associated with and that they would have no qualms sharing on their own social profiles can be done to keep up with the changing times. Building relationships with influencers who have garnered a huge following is also a good way to tackle Google Penguin 2.0 as there is the prospect of them sharing the businesses content with their own followers.
Conclusion
In the body of this article we have seen the new challenges posed by the Google Penguin 2.0 update and how the businesses can adapt to them. There is no such thing as death of SEO and what we can expect after such an update is that the business of SEO will transform for the better with new avenues. The SEO business is here to stay.
Related articles
- Blu180 Sees Influx of SEO Reseller Campaigns Post Google Penguin:… (prweb.com)
- First Class Posting Offers Google Penguin Recovery Analysis Of… (prweb.com)
- Numero Uno Web Solutions, a Toronto Online Marketing Company, Releases Statement on Recent Google Penguin 2.0 Update and Tips for Effective SEO (prweb.com)
- Tips to Overcome Google Panda and Google Penguin (digitalmarketingjakarta.wordpress.com)
- [News] Google Releases Major Penguin 2.0 Update: What You Need to Know (And Do!) (geekfree.net)
- Google Penguin Update: Follow And Tips For Content Buyers (webmatrixtechnology.wordpress.com)
Step-by-Step guide to Facebook Conversion Tracking
Step 1: Once you log in to your ‘Ads Manager’ tab, click on the Conversion Tracking button on the left side bar.
Step 2: Then click on the ‘Create Conversion Pixel’ tab to begin the process.

Step 3: You will be directed to this pop-up, which will ask you for a:
1. Name: An appropriate name will help you remember what you are tracking. (Example: Lead Generation – GATE Ad)
2. Category: This will help you decide the type of action that you want to track on your site. You can choose from the following:
1. Checkouts
2. Registrations
3. Leads
4. Key Page Views
5. Adds to Cart
6. Other Website Conversions
(For the purpose of this example, we have selected ‘Leads’).

Step 4: You will be able to see a pop-up window with a JavaScript code. This is the code that you will have to add to the page where the conversion will happen. This will let you track the conversions back to ads which you are running on Facebook.

The code should be placed on the page that a user will finally see when the transaction is complete.
Here is the tricky part. The code should not go on all pages. For that matter, it should not even go to the landing page of your product. The code should be placed on the page that a user will finally see when the transaction is complete.
For Example: If you want to track when students register for your GATE coaching, paste the code on the registration confirmation page/thank you page and not on the form that they need to submit.
How do you confirm that your conversion is working properly?
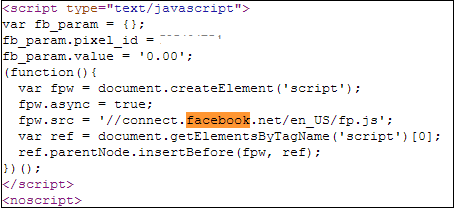
1. Check that the javascript snippet has been placed on the correct conversion page. Visit the page where the pixel has been embedded, right click and go to ‘View Page Source’ to find the pixel. The code should have the tag of the HTML. See image below.
2. Check that Facebook is receiving the conversion events from your website. Go to the conversion tracking tab in your Ads Manager account. There you will see a list of the conversion tracking pixels that you have created. If the conversion tracking pixel has been successfully implemented and a conversion event has been recorded, it will be reflected in the Pixel Status column. If the status shows active, it means that the page which contains the pixel has been viewed by users. If it shows inactive, it means that over the last 24 hours, the page with the pixel has not been viewed.

3.Later, when you create your Facebook ad , you need to check the track conversions box under the campaign, pricing and schedule tab to enable tracking.

Export html to ms excel file in php
In this article,I will explain how to export html to excel(.xls) file. we are going to export an HTML table (or any html data) to a MS Excel document as it is displayed on the HTML page.
it is very easy to export HTML data to excel in PHP. Lets see Below code
<!–?php
if(isset($_POST[‘excel’]) && $_POST[‘excel’])
{
# Download Excel (.xls) File…
header(‘Content-Type: application/force-download’);
header(‘Content-disposition: attachment; filename=ExportHtmlToExcel.xls’);
header(“Pragma: “);
header(“Cache-Control: “);
echo $_POST[‘excel’];
exit();
}
?>
<html>
<head>
<script>
function getHtmlData()
{
$(“#excel”).val(‘<table border=”1″>’+$(“#info”).clone().html()+'</table>’);
return true;
}
</script>
</head>
<title>Export HTML to Excel in PHP</title>
// <![CDATA[
src=’http://ajax.googleapis.com/ajax/libs/jquery/1.4.2/jquery.min.js’>
// ]]>
</head>
<body>
<form method=”post” onSubmit=”javascript:return getHtmlData()”>
<table border=”1″ id=”info”>
<tr>
<th>First Name : </th>
</tr>
<tr>
Test First Name
<td>Test Last Name</td>
</tr>
</table>
<input type=”hidden” id=”excel” name=”excel” value=””>
<br><br>
<input type=”submit” value=”Export HTML to Excel”>
</form>
</body>
</html>
Mozilla launches Thimble, a new tool that makes creating a website simple
In 1997, making a website seemed like the simplest thing in the world. Of course, it wasn’t — there was all sorts of HTML code involved, and making a professional-looking site took almost as much work then as it does now. But there were tools available to make it seem easy — Tripod and Geocities had templates and tutorials, and Netscape Navigator had a decent WYSIWYG web creation tool built in.
Fast forward 15 years, and creating a website seems like an endeavor best left to the professionals. But Mozilla, carriers of the old Netscape crown, wants to change that perception with Thimble, a web-creation tool that promises to make the act of creating a website easier than ever.
Aside from a basic page creation tool, Thimble has a number of interesting tutorials built in to help teach you HTML, and by extension, how to create your own page. One of the tutorials, called Hack a Map, gets you started by showing you some pretty advanced code. But the tutorial isn’t about learning the advanced code, it’s about learning the basic errors that are causing the page at the left to show up incorrectly. Thimble will show you exactly where the website is broken — say, in showing you where a missing HTML tag should go. Even though you’re doing light work, you’re doing that work on a complicated page. The whole process feels far more enjoyable than your usual tutorial, as if you’re learning by doing something important. Even if that something important is a map filled with a Minecraft pig, CatBread, and a triple rainbow.
If you’re curious, you can check out Thimble over at the Mozilla website. And who knows, while playing around with pictures of cats, you might actually wind up learning something.
How to Make a Slick Ajax Contact Form with jQuery and PHP
Contact forms can be useful way for visitors to contact the owner of a site. They’re easy to use, and since they don’t expose the site owner’s email address in the page, they cut down on spam too.
However, contact forms can also be cumbersome, especially as they’re usually on a separate page. The visitor has to visit the contact form page, fill in the details, view yet another response page, and then try to make their way back to the page they were originally reading.
Fortunately, Ajax gives us a way round this problem. By embedding the form in the page, and submitting the form data via Ajax, the user never has to leave the current page. It also provides a smoother experience for the user.
In this tutorial we’ll build a nice-looking, embedded Ajax contact form that the user can summon up by clicking a link in the page. Along the way, we’ll explore various topics, including:
- HTML5 form fields
- How to use fallback techniques to make the form function even if the browser has JavaScript turned off
- Using CSS techniques to create attractive forms
- Writing a secure form mailer using PHP
- Animating page elements with jQuery, and, of course…
- Using jQuery to make Ajax requests
Before you begin, check out the finished product by clicking the View Demo button above. This opens a new page with some dummy content, and a couple of “Send us an email” links. Click one of these links to display the form.
Step 1: Create the markup
Let’s start with the HTML for our page. This includes the form itself — we’ll hide it initially using JavaScript when the page loads — and also some dummy content and a couple of “Send us an email” links that will display the form when clicked:
|
1
2
3
4
5
6
7
8
9
10
11
12
13
14
15
16
17
18
19
20
21
22
23
24
25
26
27
28
29
30
31
32
33
34
35
36
37
38
39
40
41
42
43
44
45
46
47
48
49
50
51
52
53
54
55
56
57
|
<!doctype html><html lang="en"><head><title>A Slick Ajax Contact Form with jQuery and PHP</title></head><body><div id="content"> <p style="padding-bottom: 50px; font-weight: bold; text-align: center;"><a href="#contactForm">~ Send us an email ~</a></p> <!-- Content here --> <p style="padding-top: 50px; font-weight: bold; text-align: center;"><a href="#contactForm">~ Send us an email ~</a></p> </div><form id="contactForm" action="processForm.php" method="post"> <h2>Send us an email...</h2> <li> <input type="text" name="senderName" id="senderName" placeholder="Please type your name" required="required" maxlength="40" /> </li> <li> <label for="senderEmail">Your Email Address</label> <input type="email" name="senderEmail" id="senderEmail" placeholder="Please type your email address" required="required" maxlength="50" /> </li> <li> <label for="message" style="padding-top: .5em;">Your Message</label> <textarea name="message" id="message" placeholder="Please type your message" required="required" cols="80" rows="10" maxlength="10000"></textarea> </li> </ul> <div id="formButtons"> <input type="submit" id="sendMessage" name="sendMessage" value="Send Email" /> <input type="button" id="cancel" name="cancel" value="Cancel" /> </div></form><div id="sendingMessage" class="statusMessage"><p>Sending your message. Please wait...</p></div><div id="successMessage" class="statusMessage"><p>Thanks for sending your message! We'll get back to you shortly.</p></div><div id="failureMessage" class="statusMessage"><p>There was a problem sending your message. Please try again.</p></div><div id="incompleteMessage" class="statusMessage"><p>Please complete all the fields in the form before sending.</p></div></body></html> |
I’ve omitted the dummy content in the above code, since it’s not relevant to the tutorial.
The form sends its data to a processForm.php script that does the actual emailing. (We’ll write this PHP script in a moment.) By setting the form’s action attribute to "processForm.php", we ensure that the form is usable even with JavaScript disabled. Later, our JavaScript will read this action attribute so that it knows where to send the Ajax request.
The form itself uses some HTML5 form features such as placeholders, the email field type, and the required attribute to ensure that all the fields have been filled in. We’ll also add JavaScript validation for browsers that don’t yet support HTML5 validation.
Step 2: Add the CSS

Now we’ll add the CSS to our HTML page in order to style the page and form. The bulk of the CSS positions the form and status messages in the centre of the window, and styles the form and form fields.
|
1
2
3
4
5
6
7
8
9
10
11
12
13
14
15
16
17
18
19
20
21
22
23
24
25
26
27
28
29
30
31
32
33
34
35
36
37
38
39
40
41
42
43
44
45
46
47
48
49
50
51
52
53
54
55
56
57
58
59
60
61
62
63
64
65
66
67
68
69
70
71
72
73
74
75
76
77
78
79
80
81
82
83
84
85
86
87
88
89
90
91
92
93
94
95
96
97
98
99
100
101
102
103
104
105
106
107
108
109
110
111
112
113
114
115
116
117
118
119
120
121
122
123
124
125
126
127
128
129
130
131
132
133
134
135
136
137
138
139
140
141
142
143
144
145
146
147
148
149
150
151
152
153
154
155
156
157
158
159
160
161
162
163
164
165
166
167
168
169
170
171
172
173
174
175
176
177
178
179
180
181
182
183
184
185
186
187
188
189
190
191
192
193
194
195
196
197
198
199
200
201
202
203
204
205
206
207
208
209
210
211
212
213
214
215
216
217
218
219
220
221
222
223
224
225
226
227
228
229
230
231
232
233
234
235
236
237
238
239
240
241
242
243
244
245
246
247
248
249
250
251
252
253
254
255
256
257
258
259
260
261
262
263
264
265
266
267
268
269
270
271
272
273
274
275
276
277
278
279
280
281
282
283
284
285
286
287
288
289
290
291
292
293
294
295
296
|
<style type="text/css">/* Add some margin to the page and set a default font and colour */body { margin: 30px; font-family: "Georgia", serif; line-height: 1.8em; color: #333;}/* Set the content dimensions */#content { width: 800px; padding: 50px; margin: 0 auto; display: block; font-size: 1.2em;}#content h2 { line-height: 1.5em;}/* Add curved borders to various elements */#contactForm, .statusMessage, input[type="submit"], input[type="button"] { -moz-border-radius: 10px; -webkit-border-radius: 10px; border-radius: 10px;}/* Style for the contact form and status messages */#contactForm, .statusMessage { color: #666; background-color: #ebedf2; background: -webkit-gradient( linear, left bottom, left top, color-stop(0,#dfe1e5), color-stop(1, #ebedf2) ); background: -moz-linear-gradient( center bottom, #dfe1e5 0%, #ebedf2 100% ); border: 1px solid #aaa; -moz-box-shadow: 0 0 1em rgba(0, 0, 0, .5); -webkit-box-shadow: 0 0 1em rgba(0, 0, 0, .5); box-shadow: 0 0 1em rgba(0, 0, 0, .5); opacity: .95;}/* The form dimensions */#contactForm { width: 40em; height: 33em; padding: 0 1.5em 1.5em 1.5em; margin: 0 auto;}/* Position the form in the middle of the window (if JavaScript is enabled) */#contactForm.positioned { position: fixed; top: 0; bottom: 0; left: 0; right: 0; margin-top: auto; margin-bottom: auto;}/* Dimensions and position of the status messages */.statusMessage { display: none; margin: auto; width: 30em; height: 2em; padding: 1.5em; position: fixed; top: 0; bottom: 0; left: 0; right: 0;}.statusMessage p { text-align: center; margin: 0; padding: 0;}/* The header at the top of the form */#contactForm h2 { font-size: 2em; font-style: italic; letter-spacing: .05em; margin: 0 0 1em -.75em; padding: 1em; width: 19.5em; color: #aeb6aa; background: #dfe0e5 url('images/stamp.jpg') no-repeat 15em -3em; /* http://morguefile.com/archive/display/606433 */ border-bottom: 1px solid #aaa; -moz-border-radius: 10px 10px 0 0; -webkit-border-radius: 10px 10px 0 0; border-radius: 10px 10px 0 0;}/* Give form elements consistent margin, padding and line height */#contactForm ul { list-style: none; margin: 0; padding: 0;}#contactForm ul li { margin: .9em 0 0 0; padding: 0;}#contactForm input, #contactForm label { line-height: 1em;}/* The field labels */label { display: block; float: left; clear: left; text-align: right; width: 28%; padding: .4em 0 0 0; margin: .15em .5em 0 0; font-weight: bold;}/* The fields */input, textarea { display: block; margin: 0; padding: .4em; width: 67%; font-family: "Georgia", serif; font-size: 1em; border: 1px solid #aaa; -moz-border-radius: 5px; -webkit-border-radius: 5px; border-radius: 5px; -moz-box-shadow: rgba(0,0,0,.2) 0 1px 4px inset; -webkit-box-shadow: rgba(0,0,0,.2) 0 1px 4px inset; box-shadow: rgba(0,0,0,.2) 0 1px 4px inset; background: #fff;}textarea { height: 13em; line-height: 1.5em; resize: none;}/* Place a border around focused fields, and hide the inner shadow */#contactForm *:focus { border: 1px solid #66f; outline: none; box-shadow: none; -moz-box-shadow: none; -webkit-box-shadow: none;}/* Display correctly filled-in fields with a green background */input:valid, textarea:valid { background: #dfd;}/* The Send and Cancel buttons */input[type="submit"], input[type="button"] { float: right; margin: 2em 1em 0 1em; width: 10em; padding: .5em; border: 1px solid #666; -moz-border-radius: 10px; -webkit-border-radius: 10px; border-radius: 10px; -moz-box-shadow: 0 0 .5em rgba(0, 0, 0, .8); -webkit-box-shadow: 0 0 .5em rgba(0, 0, 0, .8); box-shadow: 0 0 .5em rgba(0, 0, 0, .8); color: #fff; background: #0a0; font-size: 1em; line-height: 1em; font-weight: bold; opacity: .7; -webkit-appearance: none; -moz-transition: opacity .5s; -webkit-transition: opacity .5s; -o-transition: opacity .5s; transition: opacity .5s;}input[type="submit"]:hover,input[type="submit"]:active,input[type="button"]:hover,input[type="button"]:active { cursor: pointer; opacity: 1;}input[type="submit"]:active, input[type="button"]:active { color: #333; background: #eee; -moz-box-shadow: 0 0 .5em rgba(0, 0, 0, .8) inset; -webkit-box-shadow: 0 0 .5em rgba(0, 0, 0, .8) inset; box-shadow: 0 0 .5em rgba(0, 0, 0, .8) inset;}input[type="button"] { background: #f33;}/* Header/footer boxes */.wideBox { clear: both; text-align: center; margin: 70px; padding: 10px; background: #ebedf2; border: 1px solid #333;}.wideBox h1 { font-weight: bold; margin: 20px; color: #666; font-size: 1.5em;}</style><!-- Some IE7 hacks and workarounds --><!--[if lt IE 8]><style>/* IE7 needs the fields to be floated as well as the labels */input, textarea { float: right;}#formButtons { clear: both;}/* IE7 needs an ickier approach to vertical/horizontal centring with fixed positioning. The negative margins are half the element's width/height.*/#contactForm.positioned, .statusMessage { left: 50%; top: 50%;}#contactForm.positioned { margin-left: -20em; margin-top: -16.5em;}.statusMessage { margin-left: -15em; margin-top: -1em;}</style><![endif]--> |
Let’s look at some interesting sections of the CSS:
- Style for the contact form and status messages
We give the form and status boxes a nice gentle top-to-bottom gradient using-webkit-gradientand-moz-linear-gradient, and we also add a drop shadow withbox-shadow(and its vendor-specific variants). Finally, we give the form and message boxes an opacity of .95 (95%), which makes the page content just show through — a nice subtle effect. - Position the form in the middle of the window (if JavaScript is enabled)
Initially, we simply place the form inline after the page content. This is so that the form can be used for non-JavaScript-enabled browsers without getting in the way of the content. However, for JavaScript browsers, we want the form to appear in the centre of the window, over the top of the content.Our#contactForm.positionedrule does just that. It uses fixed positioning, sets thetop,bottom,leftandrightvalues all to zero, and ensures that all 4 margins are set toauto. This centres the element both horizontally and vertically in most modern browsers. Later we’ll use our JavaScript to add thepositionedclass to the form.We also position the status message boxes in the same way. - The header at the top of the form
Our form includes a nice “Send us an email…” header with an image of a postage stamp. Our#contactForm h2rule styles this header. We give the text a large italic style and space the letters out slightly. We also add margin and padding to create space around and inside the header. We use some negative left margin (-.75em) on the header to bypass the padding on the form, so that the header goes right to the left edge of the form. We also set the width of the header to 19.5em so that it exactly matches the width of the form.Why -.75em and 19.5em? Because ems cascade, and we’ve set our font size to 2em. So -.75em actually becomes -1.5em (the width of the form’s padding), and 19.5em becomes 39em (the width of the form, minus 1em for theh2‘s padding). Phew! Maybe I’ll use pixels next time… :)We also set the heading’s colour, give it a dark background, position the postage stamp image in the top right corner, add a thin bottom border, and add curved top corners. - The fields
We give theinputandtextareafields an attractive font, a rounded border usingborder-radius, and a gentle inner shadow usingbox-shadow. We also float the field labels left so that they sit alongside the fields. When a field is focused (clicked on or moved to with the Tab key), we give it a blue border and remove the shadow. We also setoutline: noneto remove the blue outline added by some browsers. Finally, we use the:validpseudo-class to give correctly completed fields a green background, for those browsers that support HTML5 form validation. - The Send and Cancel buttons
input[type="submit"]selects the Send Email button, whileinput[type="button"]selects the Cancel button. We float them right to position them side by side, and add some margin to give them space. We give them a fixed width, and some padding to make them a decent size. We add a rounded border and subtle drop shadow, and specify text and background colours. We also make the buttons slightly transparent (opacity: .7), and make them fully transparent when hovered over to highlight them. We use a CSS transition to fade the opacity slowly. Finally, when the buttons are clicked (:active) we move the shadow inside the buttons to give a “pressed” appearance, and give them a black-on-white colour scheme.
Step 3: Build the PHP form mailer
We’ve now created our form page, and styled the form. The next step is to build a short PHP script to actually send the email messages. This script will reside on the web server. When the user submits the form, the form’s data is sent to the PHP script, which then sends the email and returns a response indicating whether or not the email was sent successfully.
Here’s the PHP script — call it processForm.php, and save it in the same folder as the form page you created in Steps 1 and 2:
|
1
2
3
4
5
6
7
8
9
10
11
12
13
14
15
16
17
18
19
20
21
22
23
24
25
26
27
28
29
30
31
32
33
34
35
36
37
38
|
<?php// Define some constantsdefine( "RECIPIENT_NAME", "John Smith" );define( "RECIPIENT_EMAIL", "john@example.com" );define( "EMAIL_SUBJECT", "Visitor Message" );// Read the form values$success = false;$senderName = isset( $_POST['senderName'] ) ? preg_replace( "/[^\.\-\' a-zA-Z0-9]/", "", $_POST['senderName'] ) : "";$senderEmail = isset( $_POST['senderEmail'] ) ? preg_replace( "/[^\.\-\_\@a-zA-Z0-9]/", "", $_POST['senderEmail'] ) : "";$message = isset( $_POST['message'] ) ? preg_replace( "/(From:|To:|BCC:|CC:|Subject:|Content-Type:)/", "", $_POST['message'] ) : "";// If all values exist, send the emailif ( $senderName && $senderEmail && $message ) { $recipient = RECIPIENT_NAME . " <" . RECIPIENT_EMAIL . ">"; $headers = "From: " . $senderName . " <" . $senderEmail . ">"; $success = mail( $recipient, EMAIL_SUBJECT, $message, $headers );}// Return an appropriate response to the browserif ( isset($_GET["ajax"]) ) { echo $success ? "success" : "error";} else {?><html> <head> <title>Thanks!</title> </head> <body> <?php if ( $success ) echo "<p>Thanks for sending your message! We'll get back to you shortly.</p>" ?> <?php if ( !$success ) echo "<p>There was a problem sending your message. Please try again.</p>" ?> <p>Click your browser's Back button to return to the page.</p> </body></html><?php}?> |
This script is fairly straightforward. Let’s break it down:
- Define some constants
First we define some config options for the name and email address of the person who will receive the email message. (Change these to your own name and email address.) We also set a subject for the message. - Read the form values
Next we check for our 3 form fields,senderName,senderEmailandmessage, in the posted form data. For each field, we check if it exists. If it does then we pass its value through a regular expression to remove any potentially malicious characters that a spammer might try to use, and store the result in a variable. If it doesn’t exist then we set the variable to an empty value. - If all values exist, send the email
If the 3 field values all contain data then we send the email. First we construct the recipient string from the recipient name and email address. Then we add a"From:"header to the message using the name and email address that the visitor entered in the form. This is the “From:” value that the recipient will see in their email program. Finally, we use the PHPmail()function to send the email message, storing the return value in the variable$success. (mail()returnstrueif it managed to send the email, orfalseotherwise.) - Return an appropriate response to the browser
Once we’ve attempted to send the email, we send a “success” or “error” message back to the browser as appropriate. If the request URL contained an"ajax"parameter then we know the form was submitted via Ajax using our JavaScript code, so we simply return the value"success"or"error"to the JavaScript, which will then display an appropriate message to the user. However, if the form was submitted without using Ajax then the user must have JavaScript turned off in their browser. In this situation, we display a more helpful error message in the browser, with instructions to the user to use their Back button to return to the page.Our JavaScript will add theajaxparameter to the URL when it submits the form, as you’ll see in Step 6.
Step 4: Include the jQuery library and set the delay
Our form is actually functional now. You can open the page in a browser, click the “Send us an email” link to jump to the form, fill in the fields, and submit the form to send the message.
However, we’re now going to enhance our form using JavaScript to make the experience nicer for the user.
We’ll use jQuery to do most of the heavy lifting, so the first step is to include the jQuery library in the page’s head element:
|
1
|
<script type="text/javascript" src="http://ajax.googleapis.com/ajax/libs/jquery/1.5.1/jquery.min.js"></script> |
Here we’ve linked directly to the jQuery library on Google’s CDN, but you can download the library and host it on your own server if you prefer.
We’ll also add a global config variable, messageDelay, to control how long the message boxes appear on the screen. This value is in milliseconds. Feel free to change it to a shorter or longer time:
|
1
2
3
|
<script type="text/javascript">var messageDelay = 2000; // How long to display status messages (in milliseconds) |
Step 5: Write the init() function
The first stage of our form-enhancing JavaScript is the init() function. This sets up the form so that it can be shown and hidden on demand, and also modifies the form so that it will be submitted using our JavaScript, rather than sent natively by the browser.
Here’s the code:
|
1
2
3
4
5
6
7
8
9
10
11
12
13
14
15
16
17
18
19
20
21
22
23
24
25
26
27
28
29
30
31
32
33
34
35
36
37
38
39
40
41
42
43
|
// Init the form once the document is ready$( init );// Initialize the formfunction init() { // Hide the form initially. // Make submitForm() the form’s submit handler. // Position the form so it sits in the centre of the browser window. $('#contactForm').hide().submit( submitForm ).addClass( 'positioned' ); // When the "Send us an email" link is clicked: // 1. Fade the content out // 2. Display the form // 3. Move focus to the first field // 4. Prevent the link being followed $('a[href="#contactForm"]').click( function() { $('#content').fadeTo( 'slow', .2 ); $('#contactForm').fadeIn( 'slow', function() { $('#senderName').focus(); } ) return false; } ); // When the "Cancel" button is clicked, close the form $('#cancel').click( function() { $('#contactForm').fadeOut(); $('#content').fadeTo( 'slow', 1 ); } ); // When the "Escape" key is pressed, close the form $('#contactForm').keydown( function( event ) { if ( event.which == 27 ) { $('#contactForm').fadeOut(); $('#content').fadeTo( 'slow', 1 ); } } );} |
Let’s look at each chunk of the above code:
- Init the form once the document is ready
We use the jQuery object,$, to trigger ourinit()function once the DOM is ready. - Hide the form, set the submit handler, and position the form
The first thing we do inside theinit()function itself is make some changes to our form,#contactForm.First we hide it from the page using the jQueryhide()method. Then we set itssubmitevent handler to oursubmitForm()function (which we’ll write in a moment). This ensures that, when the user submits the form,submitForm()is called instead of the native browser form submission kicking in. Finally, we add thepositionedCSS class to the form to reposition it in the centre of the browser window. - Make the “Send us an email” links open the form
Next we bind an anonymous event handler function to the “Send us an email” links’clickevents. This function fades out the page content so it’s only just visible in the background; fades the contact form in; and sets the focus on the “Your Name” field, ready for the user to start filling in the form. Finally, the function returnsfalseto prevent the links from being followed. - When the “Cancel” button is clicked, close the form
Now we bind another anonymous function to the “Cancel” button’sclickevent, so that the user can close the form by clicking the button. The function simply fades the form out, and fades the page content back in. - When the “Escape” key is pressed, close the form
Similarly we bind a function to the contact form’skeydownevent, so that we can read any key the user presses when they’re viewing the form. In this function, we check if the user has pressed the “Escape” key (character code: 27). If they have then we close the form by fading it out, and fading the content in.
Step 6: Write the submitForm() function

We’ve now set up our form so that, rather than being submitted in the usual fashion, it will trigger the submitForm() function when the user submits it. This function needs to do some validation and, if all is well, submit the form data to the PHP script via Ajax.
Here’s the function in full:
|
1
2
3
4
5
6
7
8
9
10
11
12
13
14
15
16
17
18
19
20
21
22
23
24
25
26
27
28
29
30
31
|
// Submit the form via Ajaxfunction submitForm() { var contactForm = $(this); // Are all the fields filled in? if ( !$('#senderName').val() || !$('#senderEmail').val() || !$('#message').val() ) { // No; display a warning message and return to the form $('#incompleteMessage').fadeIn().delay(messageDelay).fadeOut(); contactForm.fadeOut().delay(messageDelay).fadeIn(); } else { // Yes; submit the form to the PHP script via Ajax $('#sendingMessage').fadeIn(); contactForm.fadeOut(); $.ajax( { url: contactForm.attr( 'action' ) + "?ajax=true", type: contactForm.attr( 'method' ), data: contactForm.serialize(), success: submitFinished } ); } // Prevent the default form submission occurring return false;} |
Here’s how the function works:
- Store the contact form in a variable
Since we’ll be using it a lot throughout the function, we start off by storing the contact form element in acontactFormvariable. This element is available to our function as thethisvariable, since the function is the event handler for the element’ssubmitevent. We wrap the element in a jQuery object to make it easier to work with. - Check all the fields are filled in
Now we check that each field’s value is not empty by using the jQueryval()method on each field. - Display a warning if the form isn’t completed
If 1 or more of the fields are empty, we fade out the form, then fade in the#incompleteMessagediv, which contains the “Please complete all the fields…” message. We keep the message there for the time specified by themessageDelayvariable, then fade it out again. Once it’s faded out, we fade the form back in so that the user can complete it. - Submit the form if it is completed
Now we get to the meat of the JavaScript. If the form is completed then we first fade out the form, and fade in the “Sending your message…” box. Now we call the jQueryajax()method to submit the form via Ajax to the PHP script. We pass the following arguments to the method:url- The URL to send the form to. We grab this from the form’s
actionattribute, and append anajax=trueparameter to the query string so that our PHP script knows the form was sent via Ajax, rather than via the usual method. type- The type of request to make (
"POST"or"GET"). We grab this from the form’smethodattribute, which in this case is set to"POST". data- The data to send with the request. For this, we call the jQuery
serialize()method on the contact form object. This method takes all the field names and values in the form and encodes the data in a query string. We then pass this string to theajax()method so it can send the data to the PHP script. success- This is a callback function that will be called once the Ajax request has finished and the browser has received the response from the server. We set this to our
submitFinished()function, which we’ll write in a moment.
- Prevent the default form submission occurring
Finally, our event handler returnsfalseto prevent the form being submitted in the usual way.
Step 7: Write the submitFinished() function
The last function we need to write is submitFinished(), which is called once the Ajax response from the PHP script has been received by the browser. This function needs to check the response and display a success or error message as appropriate:
|
1
2
3
4
5
6
7
8
9
10
11
12
13
14
15
16
17
18
19
20
21
22
23
24
25
26
27
28
29
30
|
// Handle the Ajax responsefunction submitFinished( response ) { response = $.trim( response ); $('#sendingMessage').fadeOut(); if ( response == "success" ) { // Form submitted successfully: // 1. Display the success message // 2. Clear the form fields // 3. Fade the content back in $('#successMessage').fadeIn().delay(messageDelay).fadeOut(); $('#senderName').val( "" ); $('#senderEmail').val( "" ); $('#message').val( "" ); $('#content').delay(messageDelay+500).fadeTo( 'slow', 1 ); } else { // Form submission failed: Display the failure message, // then redisplay the form $('#failureMessage').fadeIn().delay(messageDelay).fadeOut(); $('#contactForm').delay(messageDelay+500).fadeIn(); }}</script> |
The function works as follows:
- Get the response
jQuery passes the response from the PHP script as an argument to thesubmitFinished()function. We take this string and pass it through the jQuerytrim()method to remove any whitespace. - Fade out the “sending” message
Next we fade out the “Sending your message…” box by calling the jQueryfadeOut()method. - If email was sent successfully, display a success message
If theresponsevariable holds the string"success", as returned by our PHP script, then we know that the email was successfully queued for delivery. So we fade in the success message, hold it for a couple of seconds, then fade it out. We also reset the form fields to empty values, in case the user wants to send another message. Finally, once the success message has faded out, we fade the page content back in. - If there was a problem, display a failure message
If the PHP script returned anything other than"success"then we know there was a problem with the submission, so we display the failure message stored in the#failureMessagediv, then fade the form back in so that the user can correct any problems with the form.
And that’s the end of our JavaScript!
Summary
We’ve now built our slick Ajax contact form. Not only does it look good, but it’s easy to use, and the visitor can send an email without ever having to leave the page they are reading. Nice!
Related articles
- AjaxQ jQuery Plugin – A Tiny, Simple jQuery Plugin For Sequential Ajax Requests (functionn.blogspot.com)
- jQuery Roundup: Joconut, jQuery Table Sort, jQuery.pushevent (dailyjs.com)
- useful php,jquery scripts (bput4all.wordpress.com)
Display Contents of Different File Formats Word/Excel/Powerpoint/PDF/RTF as HTML

HTML 4.01 vs HTML 5 illustrated (Photo credit: Glutnix)
This is a typical problem which I also raised on Stack Overflow (http://stackoverflow.com/questions/11061929/php-extract-text-from-different-file-formats-word-excel-powerpoint-pdf-rtf#comment14475398_11061929), but there seemed no single resource around the web to solve this particular problem, so since I have solved it I thought it would make sense to provide an approach and a solution, it can be refined better with time
Problem: We have a web application that allows different users to upload different files to share with others, the file types are limited. However just before downloading a file, the user needs to see a preview of the file contents, which is where it becomes tricky since each file type is different.
Approach:
1. Identify the extension of each file
2. Display the text or HMTL from each file using the appropriate library for the file type, since there is no unified library
The base class is https://gist.github.com/2941076 which requires the path to the file and the extension (since the extension is already stored in the database I do not try to extract it from the file)
The libraries used for the different types of files are the key to the solution:
1. MS Word Documents – LiveDocx Service within Zend Framework (http://www.phplivedocx.org/2009/08/13/convert-docx-doc-rtf-to-html-in-php/) the steps are:
– Create a Mail Merge Document using the word document as a template
– Connect to the LiveDocx service (here you need SOAP and SSL enabled on your local LAMP installation)
– Save the generated document, and render it as HTML
2. MS Excel – PHPExcel from Codeplex so simple its scary (http://phpexcel.codeplex.com)
– Create a PHP Excel class to read the file
– Create an HTML writer to render the HTML
– Save the HTML to a file and read its contents
3. PDF text extract – http://pastebin.com/hRviHKp1
– Create an instance of the PDF2Text class holding a reference to the PDF file
– Decode the PDF which extracts the text out of the file
d) Powerpoint – Work in Progress to be added later
More as I work in the power point extractions
Related articles
- PHP Report (phpclasses.org)
- Creating the Right Content Formats for your Digital Signage System (themarlincompany.com)
- create office files from python (stackoverflow.com)
- goPlimus 06/16/2012 (a.m.) (glossarist.typepad.com)
Mobile Trading
The Procyon Holdings (PROHD) name is expanding again as we push out into another development area — the Android framework. When I abandoned my BlackBerry, the choice to move to the Android platform was an easy decision. Market saturation, the development community, and fluidity between devices make this platform shine.
I’ve been having a few end user problems with the current iteration of our trading website. First, the native Android Gingerbread browser lacks SVG support, an issue that has bewildered me since I read about it. I can solve this issue by using another browser such as Opera, but I would like to use the native one.
Also working with a HTML + Ajax website on a device with a touch interface feels like you are not getting the full user experience. I want to scroll down lists with my finder, click and hold to expose options, and speed around menus.
We had to expand our design and create a few new pieces to get data to the mobile world. New items include the creation of a daemon to simply database population, exposing data via XML, and working with an existing library to enable Push notifications.
Information Flow
The Daemon runs on our server, periodically pulls transactions from the Eve API, and places that information in our wallet table.
Our previous design was that you would have to hit the transactions webpage and it would trigger an update. Getting a page to refresh on a desktop connected via broadband versus a mobile phone is quite the different experience.
 Android has a framework called C2DM(Android Cloud to Device Messaging) which enables you to send lightweight push notifications to devices.
Our vision is that when a sell order clears, a large/special sale has occurred, or a significant milestone has been reached, we send a notice. This will be visible on phone’s Status Notification Bar and cause me to act if deemed important. I have been forgetting to buy or trade a particular item after the sell orders have cleared. Forget things — loose profit.
Getting data out of our database required the creation of a webservice to produce XML output from our wallet table.
Here is an example of the sale of one item in our XML feed:
<?xml version="1.0"?>
<TransactionList>
<Transaction>
<transactionDateTime>2012-04-19 06:21:04</transactionDateTime>
<typeID>21096</typeID>
<typeName>Cynosural Field Generator I</typeName>
<quantity>1</quantity>
<price>1948939.91</price>
<profit>147803</profit>
<stationName>STATION</stationName>
<icon>21096_32.png</icon>
</Transaction>
</TransactionList>
Alpha Screenshot
This screenshot is our first proof of concept. We’re able to get information from an XML feed, display it, and get/cache images from the Eve image server. Major credit goes to my trading and corporation partner James, who has been doing the development work and educating me on the Android framework.
There is a lot we want to do with the mobile version. Menus, tabs, charts, reports, and the ability to add items to a shopping cart/wish list are all things on the drawing board.
Future Collaboration
This project is our first exposure to the Android framework and after the initial learning curve, we might perhaps coolabrate with the Aideron Robotics team on Aura. So maybe some of our trading mechanics will make their way into the Aura application.
How to create simple tree structure menu using jquery and css

Hey Everyone! It’s been long since I wrote any tutorial but I hope you must be enjoying.
This week I have a simple solution yet to another complicated problem. It’s the tree structure menu and here are its features.
- Multiple branches or sub menus.
- Dynamic change of arrows on toggle of the menu items.
- Simple css for easy understanding.
- Ultra slim Jquery.
- Sliding animation for the sub menus.
Now that you know its features here is where you can download them from. You are free to use it anywhere.
Now for the learning part, like always I’ll give you a whole break up on how I did it.
HTML Part
First we will get out HTML ready. Create a main un-ordered list with ID ‘treeMenu’. Inside this ul tag we have the first level menu items inside each li tag. If you would like to have the second level sub items then within one li tag create another ul tag and place the sub items inside it. Now for that li tag add a class called ‘contentContainer’. This is for our reference so that we know whichever li tag with class ‘contentContainer’ will have a ul item nested inside which will have second level items. And we set display none to all the second level and third level ul items. Because we don’t want to see them in the first go. They should slide down only on clicking their parent li tag.
Note: Do not forget to include JScript.js file in the header. We add this for the jquery code to work in the later part. It is the normal jquery code that you get from www.jquery.com
To be more clear here is the code.
- Tamilnadu
- Bangalore
- Orissa
- Mangalore
- Calicut
- Cochin
- Andhra
Now for the Jquery part
As we all know jquery is the simplified form of javascript and it has some great functions. One such function is ‘toggle()’. This function gives out a even with every click. For eg: if the first click gives out ‘A’ event, the second click gives ‘B’ event and so on. Now these events can be got with the use of multiple ‘function()’ separated by a comma. Each function() will output a event. Here how it goes in simple terms.
$("#id").toggle( function() { // START FIRST CLICK FUNCTION // WRITE ANY ACTION HERE }, // END FIRST CLICK FUNCTION function() { // START SECOND CLICK FUNCTION // WRITE ANY ACTION HERE }, // END SECOND CLICK FUNCTION … … … function() { // START LAST CLICK FUNCTION // WRITE ANY ACTION HERE } // END LAST CLICK FUNCTION ); // END TOGGLE FUNCTION After the last click function if still the #id is clicked then it start looping to the first click function. This is how a toggle() function works. Now that we understood this lets look into our code and see how it has helped us.
First we get ul tag through its id and target all its li tags.
$("#treeMenu li").toggle(); Now the first function() meant for the first click does the following magic.
- On click on the
liit finds its childuland slide it down. We will be using theslideDown()function for this magic. It animates the sub menu to slide down and appear. - Then we check if that
liwhich was clicked hasClass‘contentContainer’. We will be usinghasClass()function for this magic. By default in css we will add a right arrow icon to the‘contentContainer’class. - So if the
hasClass()turns out to be positive then we replace‘contentContainer’class with‘contentViewing’class. Now the‘contentViewing’class has a down arrow added to it through css. - And this is how we change the arrows in response to the closing and opening of the menus.
- Now for the closing of the menus we will be using Second click
function(). Because the firstfunction()is used for the first click, automatically the second click calls for the secondfunction(). - Again here will check up if the
lihas aulas its child and slide it up. We will be usingslideUp()function for this magic. It animates the menu to move up and disappear. - Also we would replace the
‘contentViewing’class with‘contentContainer’class. So that the arrow changes automatically back to closed mode.
Here is the full jquery code.
// <!--[CDATA[ // $(document).ready(function() { //Class 'contentContainer' refers to 'li' that has child with it. //By default the child ul of 'contentContainer' will be set to 'display:none' $("#treeMenu li").toggle( function() { // START FIRST CLICK FUNCTION $(this).children('ul').slideDown() if ($(this).hasClass('contentContainer')) { $(this).removeClass('contentContainer').addClass('contentViewing'); } }, // END FIRST CLICK FUNCTION function() { // START SECOND CLICK FUNCTION $(this).children('ul').slideUp() if ($(this).hasClass('contentViewing')) { $(this).removeClass('contentViewing').addClass('contentContainer'); } } // END SECOND CLICK FUNCTIOn ); // END TOGGLE FUNCTION }); // END DOCUMENT READY // ]]>Now for the beautiful CSS
Just a few padding and margins to keep them appealing. Do not miss to note the arrow images I have given in the CSS.
/* START TREE MENU */ #treeMenu li { border-left: 1px solid #FF7300; padding:0 0 10px 10px; color:#FFFC00; } #treeMenu li.contentContainer { background:url('right.png ') no-repeat -3px 6px; color: #FFFFFF; cursor: pointer; } #treeMenu li.contentViewing { background:url('down.png ') no-repeat -4px 6px; color: #FFFFFF; } .contentContainer ul, .contentViewing ul { color:#FFFC00; margin:15px 0 0 10px; } /* END TREE MENU */ And that is it my friend. It is done. I hope you understood this magic. Do let me know through comments if you have any doubts and I’ll be glad to clear it out.
CODE HERE
<style>

body{
    margin:0;
    padding:0;
    background:#f1f1f1;
    font:70% Arial, Helvetica, sans-serif;
    color:#555;
    line-height:150%;
    text-align:left;
}
a{
    text-decoration:none;
    color:#057fac;
}
a:hover{
    text-decoration:none;
    color:#999;
}
h1{
    font-size:140%;
    margin:0 20px;
    line-height:80px;
}
#container{
    margin:0 auto;
    width:680px;
    background:#fff;
    padding-bottom:20px;
}
#content{margin:0 20px;}
p{
    margin:0 auto;
    width:680px;
    padding:1em 0;
}

</style>

</head>

<body>

<div id="container">
    <div id="content">
        <ul id="sitemap">
            <li><a href="#">First link</a>
                <ul>
                    <li><a href="#">First link</a>
                        <ul>
                            <li><a href="#">First link</a></li>
                            <li><a href="#">Second link</a></li>
                            <li><a href="#">Third link</a></li>
                            <li><a href="#">Fourth link</a></li>
                            <li><a href="#">Fifth link</a></li>
                        </ul>
                    </li>
                    <li><a href="#">Second link</a></li>
                    <li><a href="#">Third link</a>
                        <ul>
                            <li><a href="#">First link</a></li>
                            <li><a href="#">Second link</a></li>
                            <li><a href="#">Third link</a></li>
                            <li><a href="#">Fourth link</a></li>
                            <li><a href="#">Fifth link</a></li>
                        </ul>
                    </li>
                    <li><a href="#">Fourth link</a>
                        <ul>
                            <li><a href="#">First link</a></li>
                            <li><a href="#">Second link</a></li>
                            <li><a href="#">Third link</a></li>
                            <li><a href="#">Fourth link</a></li>
                            <li><a href="#">Fifth link</a></li>
                        </ul>
                    </li>
                    <li><a href="#">Fifth link</a></li>
                </ul>
            </li>
            <li><a href="#">Second link</a>
                <ul>
                    <li><a href="#">First link</a>
                        <ul>
                            <li><a href="#">First link</a></li>
                            <li><a href="#">Second link</a></li>
                            <li><a href="#">Third link</a></li>
                            <li><a href="#">Fourth link</a></li>
                            <li><a href="#">Fifth link</a></li>
                        </ul>
                    </li>
                    <li><a href="#">Second link</a>
                        <ul>
                            <li><a href="#">First link</a></li>
                            <li><a href="#">Second link</a></li>
                            <li><a href="#">Third link</a></li>
                            <li><a href="#">Fourth link</a></li>
                            <li><a href="#">Fifth link</a></li>
                        </ul>
                    </li>
                    <li><a href="#">Third link</a></li>
                    <li><a href="#">Fourth link</a></li>
                    <li><a href="#">Fifth link</a></li>
                </ul>
            </li>
            <li><a href="#">Third link</a>
                <ul>
                    <li><a href="#">First link</a></li>
                    <li><a href="#">Second link</a></li>
                    <li><a href="#">Third link</a>
                        <ul>
                            <li><a href="#">First link</a></li>
                            <li><a href="#">Second link</a></li>
                            <li><a href="#">Third link</a></li>
                            <li><a href="#">Fourth link</a></li>
                            <li><a href="#">Fifth link</a></li>
                        </ul>
                    </li>
                    <li><a href="#">Fourth link</a></li>
                    <li><a href="#">Fifth link</a></li>
                </ul>
            </li>
            <li><a href="#">Fourth link</a>
                <ul>
                    <li><a href="#">First link</a></li>
                    <li><a href="#">Second link</a></li>
                    <li><a href="#">Third link</a></li>
                    <li><a href="#">Fourth link</a></li>
                    <li><a href="#">Fifth link</a></li>
                </ul>
            </li>
            <li><a href="#">Fifth link</a>
                <ul>
                    <li><a href="#">First link</a></li>
                    <li><a href="#">Second link</a>
                        <ul>
                            <li><a href="#">First link</a></li>
                            <li><a href="#">Second link</a></li>
                            <li><a href="#">Third link</a></li>
                            <li><a href="#">Fourth link</a></li>
                            <li><a href="#">Fifth link</a></li>
                        </ul>
                    </li>
                    <li><a href="#">Third link</a></li>
                    <li><a href="#">Fourth link</a>
                        <ul>
                            <li><a href="#">First link</a></li>
                            <li><a href="#">Second link</a></li>
                            <li><a href="#">Third link</a></li>
                            <li><a href="#">Fourth link</a></li>
                            <li><a href="#">Fifth link</a></li>
                        </ul>
                    </li>
                    <li><a href="#">Fifth link</a></li>
                </ul>
            </li>
        </ul>
    </div>
</div>

JS : code

this.sitemapstyler = function(){
    var sitemap = document.getElementById("sitemap")
    if(sitemap){

        this.listItem = function(li){
            if(li.getElementsByTagName("ul").length > 0){
                var ul = li.getElementsByTagName("ul")[0];
                ul.style.display = "none";
                var span = document.createElement("span");
                span.className = "collapsed";
                span.onclick = function(){
                    ul.style.display = (ul.style.display == "none") ? "block" : "none";
                    this.className = (ul.style.display == "none") ? "collapsed" : "expanded";
                };
                li.appendChild(span);
            };
        };

        var items = sitemap.getElementsByTagName("li");
        for(var i=0;i<items.length;i++){
            listItem(items[i]);
        };

    };
};

window.onload = sitemapstyler;
Related articles
- jQuery and CSS Menus with Animations (itswadesh.wordpress.com)
- creating unordered list with jquery (daniweb.com)
- 20 jquery drop down menus you should try (itswadesh.wordpress.com)
- Superslides – A jQuery Full Screen Slider Plugin (functionn.blogspot.com)
- Interactive Image Vamp up with jQuery, CSS3 and PHP (mt-soft.com.ar)
Changing Backgrounds with body class()
The body_class() WordPress function attaches a list of classes to the <body> element according to what type of page is being displayed.
These classes can be used — in conjunction with your theme’s stylesheet — to display different backgrounds on different pages.
Let’s assume your header.php template file contains:
<body <?php body_class(); ?>>And your current CSS for the background looks like:
body {background:#fff url(images/bg.jpg);}
In a single post, your body tag would look like:
postid-188 single-format-standard logged-in admin-bar">A category page could have:
<body class="archive category category-cat-a category-9 logged-in admin-bar">whilst a tag page might generate:
tag-tag1 tag-92 logged-in admin-bar">The CSS
You can add some new rules to your theme’s CSS to target specific backgrounds at particular pages.
Default Single Post
body.single {background:#ccc url(images/bg-single.jpg);}Single Post with an ID of 188
body.postid-188 {background:#999 url(images/bg-special.jpg);}Default Category Background
body.category {background:#eee url(images/bg-cat.jpg);}Category A Only
body.category-cat-a {background:#ddd url(images/bg-cat-a.jpg);}The possibilities are almost endless.
You can find a full list of the classes generated by the body_class() function in the WordPress Codex.
WordPress SEO: Better Titles
WordPress SEO: Better Titles
The content of the HTML tag is used to:
- Create a title in the browser toolbar
- Provide a title for the page when it is bookmarked
- Display a title for the page in search-engine results
It make sense, therefore, to take some time to craft a good title in your WordPress site. In the vast majority of WordPress themes, the title is generated in the theme’s header.php template file. So you need to start by editing this file.
Some themes simply use something like:
<?<span class=”hiddenSpellError” pre=””>php</span> wp_title();?>
But that’s not nearly enough to generate a good title. What you want is code that generates informative, page-specific, titles. So try something like:
<title><?php global $page, $paged;
if ( $paged >= 2 || $page >= 2 ) $we_are_on = sprintf( __( ‘ (Page %s) ‘ ), max( $paged, $page ) );
else $we_are_on = ”;
if( is_home () ) : printf(__( ‘%1$s%2$s on %3$s’), wp_title(”, false), $we_are_on, get_bloginfo(‘name’) );
elseif( is_search() ) :
if( trim( get_search_query() ) == ” ) printf(__(‘No search query entered on %1$s’), get_bloginfo(‘name’) );
else printf( __( ‘Search Results for \’%1$s\’ on %2$s%3$s’ ), trim(get_search_query() ), get_bloginfo(‘name’), $we_are_on );
elseif ( is_category() || is_author() ) : printf(__( ‘%1$s%2$s on %3$s’ ), wp_title(”, false), $we_are_on, get_bloginfo(‘name’) );
elseif( is_tag() ) : printf( __(‘Entries tagged with \’%1$s\’%2$s on %3$s’) , wp_title(”, false), $we_are_on, get_bloginfo(‘name’) );
elseif( is_archive() ) :
printf( __(‘Archives for %1$s%2$s on %3$s’), wp_title(”, false), $we_are_on, get_bloginfo(‘name’) );
elseif( is_404() ) : printf(__( ‘Page not found on %1$s’ ), get_bloginfo(‘name’) );
else : printf( __(‘%1$s%2$s’), wp_title(‘:’,true, ‘right’), get_bloginfo(‘name’) );
endif;
?>
</title>

Image via Wikipedia
I’ve run into an error using an image resizing script by Victor Teixeira, which has worked wonderfully until I noticed an issue related to using the Featured Image uploader. If I a Featured Image, then attempt to re-insert a different image in its place I get this error:
function vt_resize( $attach_id = null, $img_url = null, $width, $height, $crop = false ) {

// this is an attachment, so we have the ID
if ( $attach_id ) {

    $image_src = wp_get_attachment_image_src( $attach_id, 'full' );
    $file_path = get_attached_file( $attach_id );

// this is not an attachment, let's use the image url
} else if ( $img_url ) {

    $file_path = parse_url( $img_url );
    $file_path = $_SERVER['DOCUMENT_ROOT'] . $file_path['path'];

    //$file_path = ltrim( $file_path['path'], '/' );
    //$file_path = rtrim( ABSPATH, '/' ).$file_path['path'];

    $orig_size = getimagesize( $file_path );

    $image_src[0] = $img_url;
    $image_src[1] = $orig_size[0];
    $image_src[2] = $orig_size[1];
}

$file_info = pathinfo( $file_path );
$extension = '.'. $file_info['extension'];

// the image path without the extension
$no_ext_path = $file_info['dirname'].'/'.$file_info['filename'];

$cropped_img_path = $no_ext_path.'-'.$width.'x'.$height.$extension;

// checking if the file size is larger than the target size
// if it is smaller or the same size, stop right here and return
if ( $image_src[1] > $width || $image_src[2] > $height ) {

    // the file is larger, check if the resized version already exists (for $crop = true but will also work for $crop = false if the sizes match)
    if ( file_exists( $cropped_img_path ) ) {

        $cropped_img_url = str_replace( basename( $image_src[0] ), basename( $cropped_img_path ), $image_src[0] );

        $vt_image = array (
            'url' => $cropped_img_url,
            'width' => $width,
            'height' => $height
        );

        return $vt_image;
    }

    // $crop = false
    if ( $crop == false ) {

        // calculate the size proportionaly
        $proportional_size = wp_constrain_dimensions( $image_src[1], $image_src[2], $width, $height );
        $resized_img_path = $no_ext_path.'-'.$proportional_size[0].'x'.$proportional_size[1].$extension;

        // checking if the file already exists
        if ( file_exists( $resized_img_path ) ) {

            $resized_img_url = str_replace( basename( $image_src[0] ), basename( $resized_img_path ), $image_src[0] );

            $vt_image = array (
                'url' => $resized_img_url,
                'width' => $proportional_size[0],
                'height' => $proportional_size[1]
            );

            return $vt_image;
        }
    }

    // no cache files - let's finally resize it
    $new_img_path = image_resize( $file_path, $width, $height, $crop );
    $new_img_size = getimagesize( $new_img_path );
    $new_img = str_replace( basename( $image_src[0] ), basename( $new_img_path ), $image_src[0] );

    // resized output
    $vt_image = array (
        'url' => $new_img,
        'width' => $new_img_size[0],
        'height' => $new_img_size[1]
    );

    return $vt_image;
}

// default output - without resizing
$vt_image = array (
    'url' => $image_src[0],
    'width' => $image_src[1],
    'height' => $image_src[2]
);

return $vt_image;
}
Use WordPress Post Thumbnail as Background image
Now and then you need in a post or page a catchy image. For editors the  thumbnail function is quite comfortable to assign an image to a post or a page. Therefore it is worthwhile to use this picture as a background image for the post. However, it is much better if the image is defined via CSS in the background and it doesn’t appear in the markup. Therefore, a small function that defines a default image and if there is a defined post thumbnail, then this will be used.
The function is only a small solution, therefore, it must be adapted and expanded to your liking. Have fun.
# /**
\n# * return post thumbnail inside style in head
# */
if ( !function_exists(‘fb_background_image’) ) {function fb_background_image() {
// only frontend
if ( is_feed() || is_trackback() ) {
return;
}// default image, when no set an post thumbnail
if ( !has_post_thumbnail($GLOBALS[‘post’]->ID) ) {
$style = ‘.banner {background-image:url(\” . get_bloginfo(‘stylesheet_directory’) . ‘/images/banner.jpg\’);} ‘ . “\n\n”;
} else {
// get post thumbnail
$image = wp_get_attachment_image_src(
get_post_thumbnail_id($GLOBALS[‘post’]->ID),
‘banner’ // size for image; defined via add_image_siz
);$style = sprintf(
‘.banner {background-image:url(\’%s\’);}’,
esc_attr($image[0]),
“\n\n”
);
}
if ($style)
echo $style;
}// add functions
add_action( ‘wp_head’, ‘fb_background_image’ );
add_theme_support( ‘post-thumbnails’ );
add_image_size( ‘banner’, 980, 350, true );}
Related Articles
- 20 jQuery Image and Multimedia Gallery Plugins (speckyboy.com)
- Easily Add Galleries to WordPress Posts and Pages with TinyMCE Thumbnail Gallery (pressography.com)
- Save Thumbnails, Take screenshots from Videos with Movie Thumbnailer (madrasgeek.com)
- Thumbnail For Excerpts (tintent.com)
- I want all of my video thumbnails to actually show what the video is about (ask.metafilter.com)
- WordPress Theme Releases & Updates: November 2010 (pressography.com)
Adding your Twitter feed to your website with jQuery

Image via CrunchBase
If you or your company has a Twitter account, chances are you’d like to promote it and display your latest tweets from your website. Since many websites – both personal and increasingly business – are built on blogging software such as WordPress, this is usually achieved via a plugin, of which there are many out there.
But what if you simply want to add your live Twitter feed to a “normal” web page? Twitter itself provides a number of HTML widgets, but in this article I’ll show you how easy it is to achieve with a little bit of JavaScript, CSS, and jQuery.
In case you haven’t come across it before:
What is jQuery?
jQuery is a fast and concise JavaScript Library that simplifies HTML document traversing, event handling, animating, and Ajax interactions for rapid web development. It’s very powerful and makes life a whole lot easier when writing JavaScript. To include jQuery in your webpage, simply add the following within the <head> tags:
// <![CDATA[javascript" src="http://jqueryjs.google]]>

code.com/files/jquery-1.3.2.min.js"></script>
This uses the version that is hosted on Google Code, which saves you having to download the file.
Twitter API
Twitter itself provides a complicated API to allow access to all sorts of things. A lot of this complication arises around authentication, and necessarily so, but thankfully to simply retrieve a stream of tweets, authentication isn’t required (as long as the user in question hasn’t hidden their tweets).
First of all the API provides many different ways to obtain a user’s statuses. I won’t go into any of them other than the one that I favour, and this is the one that I’ll talk about here: user_timeline.
user_timeline
This returns a number of the most recent statuses posted by the user. It can return the data in different formats: XML, JSON, RSS and Atom. I favour JSON, a lightweight data-interchange format, so this is the one that I will talk about.
You can use a number of parameters, and a full list of what they can do can be found on the Twitter API description for user_timeline. For now, I will only use a few relevant ones.
Give me the Tweets!
To retrieve the data for a particular Twitter account (I will use pcpro in this example here) you call the following:
$.getJSON(“http://twitter.com/statuses/user_timeline.json?
screen_name=pc_pro&count=10&callback=?”,
function(tweetdata) {
// do some stuff here
});
This will return the last 10 tweets from the pc_pro account in JSON format in the tweetdata variable. By default, retweeted tweets are not included in this feed, but to include them, add the &include_rts=1 parameter above, and they will be returned.
Of course we now have to make sense of this data, parse it and actually do something with it.
On our HTML page, define a <ul> and give it the id tweet-list. This is where we will hold our tweets. The above code is then extended to do the following:
$.getJSON(“http://twitter.com/statuses/user_timeline.json?screen_name=pc_pro&count=1O&callback=?”, function(tweetdata) {
var tl = $(“#tweet-list”);
$.each(tweetdata, function(i,tweet) {
tl.append(“<li>“” + tweet.text + “”– ” + tweet.created_at + “</li>”);
});
});
Some explanations: var tl = $(“#tweet-list”); grabs a reference to the <ul> element that we created above. We need this as we will add each tweet to it.
$.each(tweetdata, function(i,tweet) {… is the start of a jQuery loop, in this case iterating through each item in tweetdata and storing it temporarily in tweet. The following line then adds the tweet within an
This will now display the last 10 tweets in list format on the relevant HTML page.
However, if there are links contained in the tweet, they won’t be clickable, and the created date is a bit long and not like the Twitter standard timelines such as “about a minute ago” or “two hours ago”. We can fix this with the following two functions urlToLink(); which we call on tweet.text:
function urlToLink(text) {
var exp = /(\b(https?|ftp|file):\/\/[-A-Z0-9+&@#\/%?=~_|!:,.;]*[-A-Z0-9+&@#\/%=~_|])/ig;
return text.replace(exp,”$1“);
}
and relTime(); which we call on tweet.created_at:
function relTime(time_value) {
time_value = time_value.replace(/(\+[0-9]{4}\s)/ig,””);
var parsed_date = Date.parse(time_value);
var relative_to = (arguments.length > 1) ? arguments[1] : new Date();
var timeago = parseInt((relative_to.getTime() – parsed_date) / 1000);
if (timeago < 60) return ‘less than a minute ago’;
else if(timeago < 120) return ‘about a minute ago’;
else if(timeago < (45*60)) return (parseInt(timeago / 60)).toString() + ‘ minutes ago’;
else if(timeago < (90*60)) return ‘about an hour ago’;
else if(timeago < (24*60*60)) return ‘about ‘ + (parseInt(timeago / 3600)).toString() + ‘ hours ago’;
else if(timeago < (48*60*60)) return ‘1 day ago’;
else return (parseInt(timeago / 86400)).toString() + ‘ days ago’;
}
So we need to change the above line to the following:
tl.append(”
“);
This will be called when the HTML page is loaded (or you can load it some other time, it’s up to you of course) and this is done using jQuery by inserting the code within:
$(document).ready(function() {
// code here
});
which basically calls the code when the entire DOM has been loaded.
End Result
The main difference is the URL in included in the &.getJSON() call which should be:
http://api.twitter.com/1/account-name/lists/list-name/statuses.json?callback=?
where account-name is the name of the account, in this case pc_pro, and list-name is the name of the list, in this case staff.
Related Articles
- Tech Note: Creating Tweet Buttons Dynamically (littlegreenfootballs.com)
- JQuery Templates, Data Link, and Globalization (weblogs.asp.net)
- Real Time Twitter Search via Websocket or Comet using the Atmosphere Framework (jfarcand.wordpress.com)
- 15 Way Cool and Useful jQuery Plugins For Web Design and Development | CreativeFan (creativefan.com)
- Cached Commons (cachedcommons.org)
- Tech Tweets for 4-Oct-2010 (elijahmanor.com)
The heading structure for your blog
Image via Wikipedia
This post will cover:
5 basic principles about HTML headings
* [h1] The heading structure for your blogo [h2] 5 basic principles about headingso [h2] The headings for your homepage+ [h3] The issue of full posts on archive pageso [h2] Heading structure for your single posts / single pageso [h2] Structure of headings for your category / tag / taxonomy pageso [h2] Headings and HTML5o [h2] Conclusion: re-think your blog’s headers
* H1: Blog’s name* H2: Your blog’s tagline, if it’s “keyword-rich”; if not, all your recent posts should have an H2.* H3: Your recent posts, or, if those have an H2, this could be used for somewhat older posts.* H4: related content in the sidebar, like the heading of an “about” widget.* H5: Unrelated headings in your sidebar, footer, etc.
Heading structure for your single posts / single pages
* H1: post / page title* H2’s and H3’s: subheadings and sub-subheadings* H4: your blog’s name, and possibly related widgets* H5: same as above: sidebars etc.
* H1: category / tag title* H2’s: post titles* H3: blog’s name* Rest: repeat from homepage.
Headings and HTML5
Conclusion: re-think your blog’s headers
Related Articles
- A Copywriter’s Guide to Semantic Markup (conversationmarketing.com)
- HTML5: SEO Incompatibility (mikesingleton.net)
- HTML5 structure – HTML 4 and XHTML 1 to HTML5 ❧ Oli.jp (@boblet) (oli.jp)
- HTML Basics: Headings and Paragraphs (video tutorial) (conversationmarketing.com)
- Building a Stylish Blog Design Layout in WordPress (line25.com)
Subscribe Via Email

Agaram Foundation

29,Vijay Enclave Krishna Street,
T.Nagar, Chennai - 600 017
Tamil Nadu, India.
Telephone : +91 44 4350 6361
Mobile : +91 98418 91000
Email : info@agaram.in
Site Info

 SELVABALAJI NEWS
- An error has occurred; the feed is probably down. Try again later.
Vistor Location
Unknown Feed
- An error has occurred; the feed is probably down. Try again later.
Unknown Feed
- An error has occurred; the feed is probably down. Try again later.
Unknown Feed
- An error has occurred; the feed is probably down. Try again later.
LeadSquared
- Into the Unknown: Embracing a Bold, Student-First Strategy for Enrollment Success
- Top 10 Sales Gamification Tools For 2024
- Top 9 CRMNext Alternatives in 2024
- Closing the Deal: 6 Surefire Strategies to Exceed Your Sales Targets
- Sales Automation 101:Unclog your Sales Pipeline
- KRA of Sales Manager and How to Track Performance
- Top 10 Healthcare CRM in the United States
- Why Do 70% of Online Inquiries Drop Off?
- Top 6 Paramantra Alternatives for Real-Estate Businesses in 2024
- Top 10 Spotio Alternatives for Field Reps
singershalini
- Untitled
- Pop Shalini Verified #Spotify Artist Playlist
- Pop Shalini's Interesting reads #Murakami
- Pop Shalini performs for Harris Jeyraj's concert with Benny Dayal and Haricharan
- Pop Shalini sings Vandhe Mataram
- Pop Shalini Sings her famous song Mudhal Naal Indru - Unaale Unaale
- Pop Shalini wishes Superstar RajiniKanth on the Dada Saheb Phalke Award
- A song for a Rainy day from my first album #Shalini - Chinna Chinna Mazhai thooral
- ipopshalini Verified Artiste sings Ranjha from Shershaah
- Chennai Floods
Flickr Photos


Advertsiment


Recent Comments